
How to Use Guide – PRO, Essential & Entry Models
Assembly
> View Stand Desk Assembly Video
Assembly of your Stand Desk will take 20 – 25 minutes. The assembly of your Stand Desk does not require any other tools and uses a fast assembly frame system with pre-drill insert to attach the desk to the frame.
We recommend two people are available to move the frame onto the desk top and to move the desk to an upright position.
No tools are required for assembly. An alan key comes with the desk and all attachment points are pre-drilled.
How to Use Guide
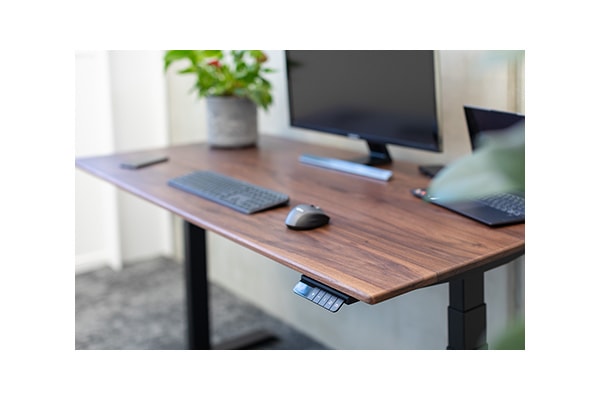
For the PRO model desks Simply place your wireless charging compatible device on the wireless charging icon to the left of the desk and it will start charging.
We recommend you read our how to best use your stand desk article. It covers off all the methodology to make the most of your Stand Desk.
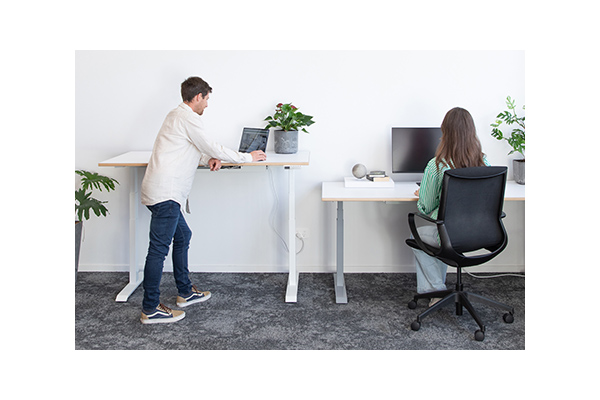
The Stand Desk PRO & Essential models offer a height range of 640mm to 1270mm heights. In practice this will provide the correct range for sitting and standing positions for people between the heights of 5’0′ and 6’7” (152cm – 201cm).
The Stand Desk Entry model has a height range of 700mm to 1200mm heights. In practice this will provide the correct range for sitting and standing positions for people between the heights of 5’4′ and 6’4” (162cm – 193cm).
Basic Controller Functions
Simply use the up and down arrows to move to your desired sitting or standing positions.
To save a position simply move to your desired sitting or standing position and press the M key on the right of the controller and then within 5 seconds press either the 1 or 2 button to save that position on that button.
You will now be able to move to that position with one button press.
If you have multiple people using the desk we recommend you use the Stand Desk app to save your personalised sitting and standing positions on the desk.
Press and hold down the M button until the heart icon turns into a bell icon.
Press the + icon twice until you see padlock icons. Press the M button again. Use the + icon until you view the locked padlock icon. Then press the M button and you will see a tick icon come up.
After 10 seconds of non use the desk will show a padlock icon and will be locked.
You can leave it now permanently locked and still use the desk by pressing the icons in the shown sequence on the screen.
To permanently unlock the desk again press any button on the controller and then press each of the buttons from left to right as shown on the screen.
Then press and hold down the M button until the heart icon turns into a bell icon.
Press the + icon twice until you see padlock icons. Press the M button again. Use the + icon until you view the unlocked padlock icon. Then press the M button and you will see a tick icon come up.
Move the desk to the highest position you wish the desk to be able to go to.
Then press and hold down the M button until the heart icon changes into a bell icon.
Press the + icon once until you see the up and down icons.
Press the M button again and then press the + button until you see the up MAX icon with a line above it.
Press the M button and you will see a tick.
Move the desk to the lowest position you wish the desk to be able to go to.
Then press and hold down the M button until the heart icon changes into a bell icon.
Press the + icon once until you see the up and down icons.
Press the M button again and then press the + button until you see the down MIN icon with a line above it.
Press the M button and you will see a tick.
Press and hold down the M button until the heart icon changes into a bell icon.
Press the + icon once until you see the up and down icons.
Press the M button again and then press the + button until you see the OFF icon.
Press the M button and you will see a tick.
Trouble Shooting
You will need to do a reset of the desk. Simply hold down button until the desk reaches the lowest setting.
Release the button and then press the down button again and continue to hold the down button for 10 seconds. The controller will flash a RESET message.
Release the down button and then hold it again until the desk makes a small up and down motion and displays the minimum height 63.7 (72.0 for the Entry model).
You will need to do a reset of the desk. Simply hold down button until the desk reaches the lowest setting.
Release the button and then press the down button again and continue to hold the down button for 10 seconds. The controller will flash a RESET message. Release the down button and then hold it again until the desk makes a small up and down motion and displays the minimum height 63.7 (72.0 for the Entry model).
If you still are having issues with the desk please contact us asap and we will resolve any issues you may have.
